Survival Tips – Edible Plants Part IV

Howdy Partners,

Sorry its been so long since my last post. Life has been hectic, but I’m back and in full force. Today we are gonna cover some more edible plants. I really enjoy this topic cause I love learning about the outdoors and some of the plants you would never in a million years think you could eat and that they would sustain life. So lets jump right in.
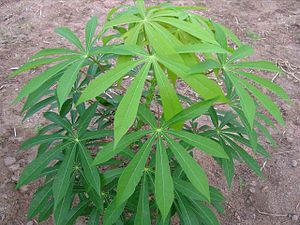
Manioc Root
Manioc Tree

  1. Manioc (Cassava): Perennial shrub. The Manioc gros up to three to nine feet tall. It has fingerlike leaves radiating from central, jointed stem. You can find the Cassava in all moist, tropical areas. The Manioc roots need to be ground into pulp. Then cook them for one hour to remove poison from the roots. Once the pulp is cooked thoroughly shape the remaining pulp into cakes for baking. You can also mix in some flour into the cakes before you cook them and they will last a really long time as long as they are shielded from insects. Remember that the roots must be cooked, they are extremely LETHAL if ate RAW.
    Maple
  2. Maple: Common tree in scores of species. Leaves have three distinctive lobes; the maple fruits have two lobes and flutter as they fall. The Maple grows throughout temperate forests. You can eat the Maples young leaves and seeds. To get the sweet sweet nectar that everyone loves so much all you need to do is cut a V-shaped notch in the tree trunk and then collect the sap or what we say Maple Syrup YUM YUM! You can also chew the leaves and seeds; or eat the bark.
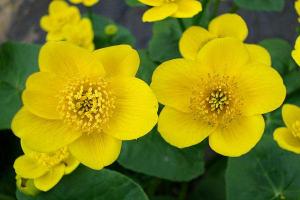
    Marsh Marigold
  3. Marsh Marigold: Flowering water plant. The Marsh Marigold has beautiful round, dark green leaves, five-petaled yellow flowers. You can find them in temperate zones to arctic; bogs, streams, and lakes. You can eat every part of the Marsh Marigold but it must be cooked first. You want to bring water to strong boil and then cook in the water until tender.
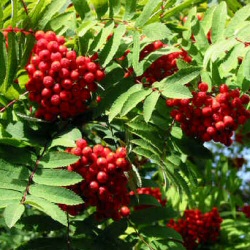
    Mountain Ash
  4. Mountain Ash: Small tree with orange or red fruits. The Mountain Ash has clusters of white flowers three to five inches apart. The Mountain Ash has smooth grey bark and it grows in woody and rocky places in temperate zones. The Mountain Ash has berries that are edible, you will want to boil the berries to reduce the sharp taste.
    Mulberries
  5. Mulberries: Small to medium tree. The Mulberry looks like large blackberries, with leaves that are deeply lobed and serrated. The Mulberry tree grows in forests and fields of northern and southern temperate and tropical zones. Berries are heavily seeded but very juicy. You can eat the berries raw, cooked, or dried. Try making jam, yum yum.
    Nipa Palm
  6. Nipa Palm: Broad, short palm. The Nipa Palm is a little different then most tree’s the trunk of the Nipa mostly grows underground.  The leaves shoot up from the trunk and can be as large as 20 feet tall, is that not out there or what? The Nipa Palm grows in the mud of east Asian shorelines. What you want to do is cut the stalks of the leaves and drink the sugary liquid juice that comes out. You can also eat the seeds but they are kinda hard. Another great use for this tree other then eating is to use the leaves to thatch a roof, since they are so large and sturdy. 
    Papaw
  7. Papaw: Shrub or small tree with brownish-gray bark. The Papaw has white, six petaled flowers. The fruits are two to six inches long. The largest ones are indigenous to North America. It grows in temperate forests; northern variety is deciduous while southern is evergreen. You will want to eat the fruit raw because it is high in protein. 

Thank you for joining me today in learning about some more plants that are edible. Remember that these are last resort and should not be ate in large quantities. I hope you learned something new today. Also make sure to get out and enjoy this beautiful country that we have at our fingertips. Just remember to make sure to bring the proper supplies.

Please let comments and questions below. Also don’t forget to click on the “follow” button so you stay up to date on all nw tactical posts.

nw tactical

Survival Tips – First Aid Part III

Hey Y’all, 

Welcome to Part III of emergency first aid. Remember that these are tips if you are in an emergency and do not have access to a hospital. You should always take anyone who is hurt to a hospital if you have that option available and remember to always call 911, do not hesitate because a few seconds could be the difference between life and death or coherent or vegetable. All right lets jump right in and get out boots muddy.

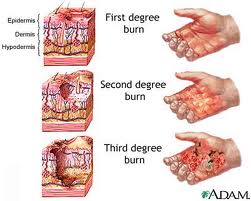
  1. thermal burn
    Electrical Injuries – Symptoms: Thermal burns, usually there will be a entry wound and an exit wound with lightening. The patient will most likely go into shock, they will experience breathing difficulties and cessations or could possibly have no pulse. Possible Condition:  Electrical burns. Electric shock. Course of Action: Do not approach the victim until you know for sure that the victim does not have electricity still running through his body. Immediately cover the wounds with sterile, dry dressings and bandages. Treat victim for shock and administer CPR if needed.
    frostbite
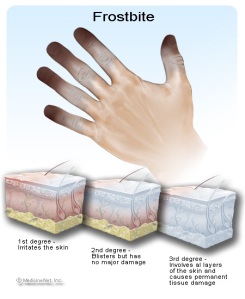
  2. Frostbite – Symptoms: The part of the body that is frostbitten will have a loss of sensation. The skin will appear waxy. It will also be cold and white, yellow, blue or flushed. Possible Condition: Parts of your body have been exposed to extremely low temperatures for an extended period of time. Course of Action: Remove any accessories from the area that has been exposed and is frostbitten. Immediately soak the affected area in a warm bath (make sure the water is no more then 105 degrees F) until color and warmth returns. Dress frostbitten area with sterile dressings and bandages. If your hands and feet are frostbitten place the gauze between the toes and fingers. A tip to help warm up the hands is to place them under your armpits; and if possible place your frostbitten feet on another persons stomach. It is very important to remember absolutely DO NOT RUB FROSTBITTEN SKIN.
    fungal infection
  3. Fungal Infections – Symptoms: The skin that is infected especially the feet and groin will be covered with irritating rash, blisters, swelling, itching, and scales. Possible Condition: Fungal Infection growing on body. Course of Action: Make sure to keep the infected area clean and dry at all times. A great cure for a fungal infection is to expose the infected area to sunlight as much as possible. Also make sure not to scratch the area. Another form of treatment is ointments, and powders.
    heat stroke
  4. Heat-Related Illnesses – Symptoms: You will experience cramps, dizziness, weakness, nausea, pale skin, you will be flushed, your skill will be moist and cool, or ashen. You will also experience a rapid but weak pulse. Possible Condition: If the victim is experiencing cramps get them to a cool area, give them cool water to drink; and massage and stretch affected muscles. If the victim is experiencing heat exhaustion then move them to a cool place as well; make sure to loosen the clothing so its not touching their skin. Then apply wet towels directly to the skin, fan victims body; give cool water to drink. For heat stroke, follow the same steps for heat exhaustion. Make sure to make them rest on their side; absolutely do not let the victim to continue their normal activities for rest of the day and then have them re-evaluate them the next day before allowing to return to any physical activities. 
    hypothermia
  5. Hypothermia – Symptoms: The victim will have a glassy stare, they will shiver, and experience numbness. They also may become unconscious. Possible Condition: The victims entire body’s temperature will loss heat and drop below safe temp levels. Course of Action: First and foremost remove any wet clothing from the victims body and get them dry ASAP. You will want to gradually warm the victim by adding layers gradually. Once they have reached a safe temp put them in warm, dry clothing and have them move to a warm, dry place. Once you have moved them to a warm environment give them warm liquids but make sure they do not contain any alcohol or caffeine. Usually most people think of tea but make sure its a non caffeinated tea. The reason i keep saying gradually is cause you do not want to warm the victim to quickly or submerse them in a warm bath because it could cause heart problems.
    insect bite
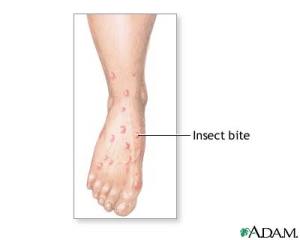
  6. Insect and Scorpion Stings – Symptoms: There will be extreme pain in effected area. The victim also might have an allergic reaction. They also may have excessive salivating from the mouth this will be associated with the venom from spider and scorpions bites/stings. Possible Condition: This may be caused by bee stings, spider bites, scorpion stings, etc. Course of Action: If the victim has been stung then first you will want to remove the stinger with either tweezers, your fingernails, or you can run a credit card over your skin. Wash the area with warm water and soap. Cover with a bandage and keep it clean, then apply ice to reduce swelling. After the sting immediately check for anaphylactic shock. If the victim is stung by a scorpion or bit by a spider, wash the wound and apply an ice pack. If available and victim needs it give them antivenin.

I hope you learned some new first aid tips reading this post. Remember that only use these tips if you are in an emergency situation and can not access a hospital. Always call 911 or take the victim to an emergency room if that option is available. Please leave any comments or questions below, also don’t forget to click on the button at the bottom of the screen to follow my blog and stay up to date on all new posts. Thank you and hope to have you back soon.

Survival Tips – Backpacking/Hiking/Camping Kit

Aloha,

Since my last post was on first aid kits I am gonna keep with the general theme. I will be covering what you should pack in a kit for either hiking, backpacking, camping, or hunting. Remember that you should always modify your kit depending on your particular traveling conditions, size of the group, and season and duration of travel. Alright lets begin with the basics of every kit

    • Knife (all-in-one tool) I recommend that you carry a Leatherman. One of the basic Leatherman knifes will suffice but I would recommend spending the extra money and getting one of the top of the line ones with all the different tools. They are extremely durable and handy. My family bought one for my Marine brother-in-law and he said it was the most important tool he had in the sand box. He couldn’t thank us enough and said that the tool was passed around his entire platoon.
    • Ka-Bar Utility/Fighting Knife or SOG SEAL Pup. These are not required but I highly recommend them. In my honest opinion I think they are the top two knife’s on the market. The Ka-Bar is strong and durable, and the SOG is light and can be used for many different tasks. ( I recommend reading my previous posts on the Ka-Bar and SOG to learn more.)
    • ESEE Candiru Blade – This little knife is one badass MOFO. It will make any task that much easier. I also recommend you reading my previous blog post on this. You do not need to carry all of these because that would take up to much room and add to much weight but they will be great additions to any pack and in my opinion you can never have enough knives when out in the wilderness.

wire saw

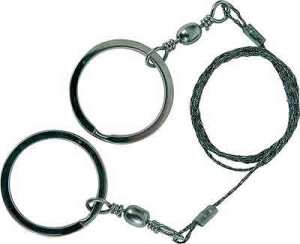
  • Wire Saw
  • Lighter/stainless steel matches
  • Candle

MagnesiumBlock_Full

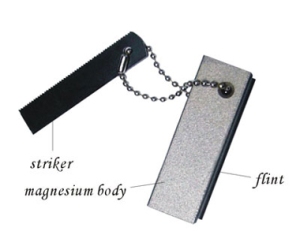
  • Magnesium block & Striker
  • Magnifying Glass
  • Signaling Mirror
  • Water Purification System
  • 2 Percent Tincture of Iodine
  • Water Containers
  • Pots/Containers for Cooking
  • Tarp
  • Tent

colored-paracord

  • Para-Cord 100 feet ( I recommend reading my previous blog post on Para-cord)
  • Colored tape
  • Needle and Thread

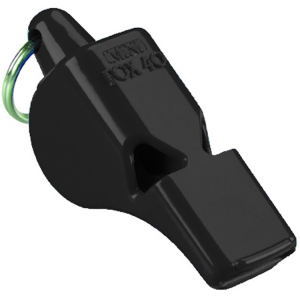
Pealess Whistle

  • Pealess Whistle
  • Flashlight
  • Compass and/or GPS
  • Mirror and Reflective Red Square incase your electronics fail and you need to signal for help manuelly
  • Spare Batteries
  • Maps
  • High-Energy Foods (Granola, Hard Candies, Etc)
  • Powdered Drink Mixes, including one with Caffeine
  • Padlocks – To Secure Gear, if necessary

Head Lamp

    • Head Lamp
    • Ace Bandages
    • Antifungal Foot Cream
    • Duct Tape (If you can duct if F*@k It)
    • Sports Drink Powder for Rehydrating (Especially for Combatting Diarrhea)
    • Waist Bag (Front Accessible)
    • Antibacterial Liquid

Silica_gel

  • Silica Gel
  • Hand Wipes
  • First Aid Kit ( Please see previous post to get a good idea of what you should include)
  • Insurance Documents, Money Belt
  • Books To Read
  • Playing Cards

The next set of items are not required but are recommended when traveling in a Temperate Forest:

bear spray

      • Bear Spray: Bear Spray is a stronger form of Pepper Spray
      • Fishhooks and Line

snare

  • Thin Wire For Snares
  • Solid Containers for Sealing Food

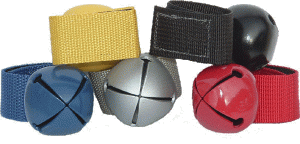
bear bells

  • Bear Bell
  • antivenom Serum

Next set of items are recommended if traveling in a Rain Forest:

    • Over-The-Counter Treatment for Diarrhea
    • Antihistamine Treatment for Allergic Reactions

EpiPen

  • Epinephrine Auto-Injector Pen; Injection counter severe allergic reactions to stings and bites
  • Cream and Shampoo to repel insects and treating head lice
  • antivenom Serum and Elastic Bandages for snakebite management
  • Lidocaine Hydrochloride (relief for excruciating stings from conga ants, caterpillars, stingrays)
  • Sunscreen
  • Oral Rehydration Salts
  • Insect Repellent (Deet)


Mosquito Netting

  • Mosquito Netting
  • Hammock
  • Fishhooks and Line


The next set of items are recommended when traveling to the Desert:

  • Extra Water, Easily carried
  • Small Stove w/ Fuel Canister
  • Oral Rehydration Salts
  • Sunglasses
  • Lip Balm
  • Sunscreen

The next set of items are recommended when traveling in the Mountains:

    • Small Stove w/ Plenty of Bottled Fuel

Sunglasses

  • Sunglasses
  • Avalanche Transceiver


crampons

  • Crampons
  • Ice Ax
  • Avalanche Probe
  • Bear Bell
  • antivenom Serum


The next set of items on the list are recommended for traveling in Cold Regions:

  • Small Stove w/ Fuel Canister
  • Sleeping Pad (also make sure that your sleeping bag is rated for the correct temperature. IE -0 degrees or -5 degrees)
  • Sunscreen
  • Sunglasses
  • Cross Country Skis or Snowshoes
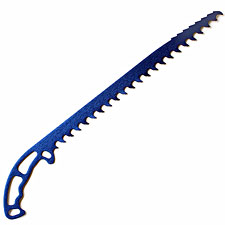
  • snow saw

  • Snow Saw or Shovel
  • Vitamins

Last but not least this set of items are recommended for travel on Water:

  • Fishhooks and Line
  • signal flares

  • Signal Flares, Whistle
  • VHF Radio, EPIRB
  • 2 Solar Stills, Containers to Catch Rain
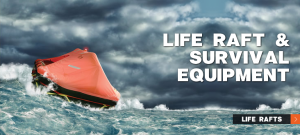
  • life raft

  • Life Raft Repair Kit

All these items are not required but highly recommended that you carry with you when you travel. You can also add or subtract any items that you think you will or will not need. Also remember to adjust the amount of items you bring depending on the size of your party, that will be one of the most important things to remember. I didn’t add this to the list but I recommend carry some sort of weapon strictly for protection. I recommended two different knives that are great for many different tasks but they both are also great and protecting you and your loved ones. The Ka-Bar is extremely sharp and has a 7 in long blade that will cut through most any animal, the name means to Kill a Bear. Also the SOG SEAL Pup is probably one of my favorite knives on the market right now, it is relatively affordable at only $50.00. The SOG comes crazy sharp and can be used for a dizzying number of tasks and the shape of the blade is designed for maximum damage when thrust into soft tissue. The shape of the blade was actually designed by a super secret group of soldiers in the Vietnam War. If possible I honestly recommend carry a gun of some sort. You can easily pack a hand gun in your backpack or carry on your waist, or if you don’t mind carrying something bigger a shotgun would be the ideal weapon to carry. It is not necessary to carry and weapon and if you do not feel comfortable carry then I recommend that you do not but if you do not mind and are comfortable using a gun then definitely bring one with you. I hope this list comes in handy for anyone who is planning a trip soon. Please leave any comments or questions below and don’t forget to click on the follow button at the bottom of the screen so you don’t miss out on any nwtactical blog posts.
Thank you for reading!!!

What to Pack in a First Aid Kit

Hi NWTactical Readers,

I’m going to be covering what the American Red Cross recommends for First Aid Kits. This post is different then the previous one I posted called Bug-out Bag. A bug-out bag is incase of Natural Disasters and economic emergencies, this kit is what you should carry just on a typical hike or camping trip and in your home and car. Lets get started with what you should have in a first aid kit. 

The American Red Cross recommends that you always carry a first aid kit. They say you should keep one in your house, and your car. Also if you are going camping, hiking, or even backpacking.

  • Absorbent Compress Dressings, 5×9 inches
  • 25 Assorted Adhesive Bandages
  • 10 Yards of Adhesive Cloth Tape
  • 5 Packets of Antibiotic Ointment
  • 5 Packets of Antiseptic Wipes
  • Space Blanket
  • Breathing Barrier, w/ One-Way Valve
  • Instant Cold Compress
  • 2 Pairs Gloves, Non-Latex. The reason you want non-latex is because a lot of people are allergic and you don’t want to make that situation worse by causing an allergic reaction
  • 2 Packets of Hydrocortisone Ointment
  • Scissors
  • 1 Roller Bandage (elastic band), 3 inches wide
  • 1 Roller Bandage (elastic band), 4 inches wide
  • 5 Sterile Gauze Pads, 3×3 inches
  • 5 Sterile Gauze Pads, 4×4 inches
  • Oral Thermometer (no glass or mercury)
  • 2 Triangle Bandages
  • Tweezers
  • Instruction Booklet for Administering First Aid

This might seem like a lot of items but it is the minimum you should carry and it will surprise you how small of a box/bag it will fit in. Remember you should keep on in your home and every car you own, also carry one on a camping trip, hiking, or backpacking trip. Also go through the kit with your family and make sure your children understand all the items in the box. It also wouldn’t hurt to give them a short crash course on how to administer a bandage and oitment. It will go a long ways in making them more confident and comfortable using the kit,. especially if something happens and you are not there to assist them or something happens to you. THank you for reading and I hope you learned something new and I really hope that you will make one of these kits. Please leave any comment or questions below. Also don’t forget to click on the follow button at the bottom of the screen so you don’t miss out on any new posts.


Survival Tips – Part II Edible Plants

What’s up Y’all,

I’m back with Part II of edible plants. I love this topic, I think its cool learning about what tree’s and plants are edible. Some of them I would have never expected you could eat. Let’s start with my usual disclaimer. ONLY eat these if you are in a survival situation and you do not have any other options and make sure that you only eat a small quantity some of these plants can make you sick if eaten in large quantities. Just like most food for that matter. Well lets dive right in and get out grub on.
cattails

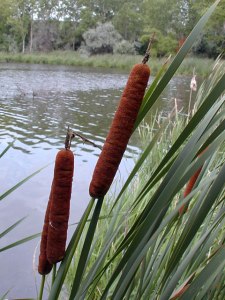
  1. Cattails: Grasslike, water-loving plants. Grows up to six feet tall. Cattails produce distinctive brown heads. The stems, pollen, and young seed heads are edible. Gather young, tender shoots and you can either eat them raw or cooked. You can also boil the young heads and eat them like corn on the cob(make sure to salt and butter :)) You can also make dough by mixing the pollen and water and then either bake or fry. Not only is this plant edible but you can use the fluff for tinder and the leaves for weaving. Also burn to make a natural bug repelant.
    chicory_blue
  2. Chicory: Flowering plant on stems up to four feet tall. Thick, hairy leaves with sky blue flowers. Chicory grows throughout the temperate Norther Hemisphere. The best part is that you can consume the entire plant, no picky eating here. To eat the leaves boil them or consume raw. Boil roots and/or roast them. If you roast the roots you can grind them into a powder and use as a coffee substitute.
    Chokeberry
  3. Chokecherry: Shrub that grows up to eight feet tall and bears dark fruit. Tiny, white flowers. The Chokecherry grows in woods and swamps in temperate zones. The berries of the Chokecherry are edible but do NOT eat the leaves and pits. Both are extremely toxic. Mr. YUCK :(> says make sure not to confuse with buckthorn berries, which cluster along stems and cause vomitting.
    Clover
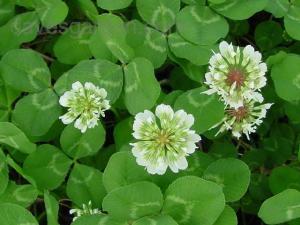
  4. Clover: Small plant with flowers of white, cream, pale green, or pink. Leaves (in three lobes) and roots are edible. You can either consume raw or boil them. The roots of the plant are sweet and are best when smoked over an open fire.
    coconut palm
  5. Coconut Palm: Common palm tree. Found throughout tropics, especially near coast lines. Coconut Palms are a great source of nutrition when on a deserted island. The entire Coconut Palm can be consumed. The milk in a coconut is great if you are dehydrated because it has plenty of vitamins and sugars which need to be replenished. You can eat the Coconut meat raw or you can dry it in the sun to preserve if you are trying to escape the deserted island you are trapped on. Not only is the Coconut a great source of food but you can boil the nuts to render an oil that you can either cook with or you on your skin. You can use the husks as tinder and it will also repel mosquitoes. The most dangerous part of the Coconut is the shell itself. Make sure not to fall asleep under a tree, more people are killed by falling Coconuts then sharks. Coconuts floating in the sea are a great source of water so if you are ever stranded on a boat in the ocean look for floating Coconuts, but then again if you see floating Coconuts you probably are not to far away from an island. 
    Crowberries
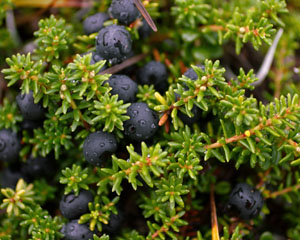
  6. Crowberries: Dwarf evergreen shrub. The Crowberries are shiny, small black berries with needlelike leaves. Grows in arctic tundra. Berries are edible raw or dried. Dried fruits always keeps better then raw fruit. One unique trait of the Crowberry is that the berries remain on stems throughout winter.
    Daisy
  7. Daisy: Ox-eye daisy is a bright perennial flower, with yellow button inside a ring of white pedals. Daisies grow in temperate climates throughout the world. They can grow up to three feet tall. The Daisies young stems and young leaves are edible. An interesting fact about Daisy’s is that you can steep the flowers to make tea that is great for soothing coughs. Gotta love homeopathic medicine. 
    Dandelion
  8. Dandelion: Low-Growing weed. Bright Yellow flowers, hollow stems, with jagged-edged leaves radiating from central stems. The Dandelion grows in the Northern Hemisphere. One great aspect of the Dandelion is that the entire plant is edible, so do not worry about being picky with this plant just pop the whole thing in your mouth and enjoy. YUM YUM. What makes Dandelions a great survival food is that they contain large amounts of Vitamins A & C.

I hoped you learned something new reading this post. I sure know I learned a few cool facts while researching this post. Who would ever have thought that Dandelions are edible and high in vitamins, and I never even heard of Crowberries before I started the research. Once again please only eat most of these plants when you are in a survival situation and you need them for survival. Some of these plants are great in moderation but can cause sickness if ate in large quantities, except for cranberries eat as much of those as you want they are a great way to clean toxins out of your system. If you have any questions or comments please leave them below. Also don’t forget to click on the follow button so you can stay up to date on my new posts.

Survival Tips – First Aid Part II

P79_first_aid__14244_zoom-287x300

What’s up Y’all?

Welcome back, we will be continuing talking about how to treat minor injuries if you are stuck far from a hospital. Please remember that this is something you should only do if you cannot access an emergency room. Alright lets dive right in.

  1. Boils – Symptoms: Red, tender spot on skin. Soft, pus-filled center forms amid tender area. Possible Condition: Skin abscess-deep, localized infection. Course of Action: Soak boils in warm water or apply heat packs to increase circulation and improve body’s ability to fight infection. Do not attempt to drain boil until it forms a “head” or pustule. If large boil forms, lance it with a sterile needle or knife and drain pus. Cover w/ sterile gauze and bandage.
  2. Breathing Difficulties – Symptoms: Slow or rapid breathing. Gasping, clinching the throat with one or two hands. Deep or shallow breathing. Gurgling, wheezing, dizziness. Unusually cool or moist skin. Possible Condition: It could be asthma, and/or bronchitis. Hyperventilation, often caused by anxiety, head injury, or severe bleeding. Allergic reaction. Foreign object in air-way. Course of Action: Switch person’s position; lying on side w/ upper leg bent or sitting may improve breathing. To treat blocked airway(choking), give blows to the back; wrap your arms around victim’s abdomen from behind, place fist just above naval, grab fist w/ other hand and make fast, upward thrusts into abs. If you find yourself alone and choking you can use an object around you like a chair or if nothing is around you that will work try using your fists like you would on someone else. If victim in unconscious and not breathing, place victim on back, push down on forehead while pulling up on bony part of jaw to lift the chin. This “head-tilt chin-lift technique” moves the tongue so air can reach the lungs. Check victims. If still not breathing, give two rescue breathes with each breath lasting one second. Pinch nose shut; take a breath and make a complete seal over victim’s mouth; blow in to make chest rise. Check to see if breaths go in; check for pulse by feeling at side of windpipe. If breaths do not go in, clear airway. If victim has no pulse and is not breathing begin CPR. If victim has a pulse but is not breathing, give 10 rescue breaths per minute until victim breathes on his own.
  3. Burns – Symptoms: Skin is red, dry, and swelling. In more severe cases, skin has blisters, appears wet or mottled, or skin turns brown or black. Possible Conditions: Thermal burns; radiation burns (sun’s ultraviolet light) Course of Action: Cool burn with lots of cold, running water. Cover with sterile dressing and bandage. In severe cases, take steps to minimize shock. Do not let victim get too hot or cold. Do not apply ice except if the burn is small, and then for only 10 minutes. Do not attempt to clean or apply ointment directly on a severe burn.
  4. Cuts and Abrasions – Symptoms: removal of outer skin layers. Red rash caused by scraping. Bleeding from opening in skin caused by sharp object. Possible Condition: Abrasion, laceration, puncture wound, or avulsion (tearing/ removal of skin and soft tissue). Course of Action: Clean abrasions w/ soap and water to prevent infection. Care for open wounds w/ dressings and bandages.
  5. Dehydration – Symptoms: Thrist. Dizziness. Dry mouth and nasal passages. Infrequent urination; urine is dark. Weakness/fatigue. Headache. Confusion, irritability, slurring of speech. Possible Condition: Body has lost too much water to function properly. Course of Action: Drink small amounts of water at frequent intervals. Keep clothes on; clothing barrier decreases water loss through sweating. Sugar or oral rehydration salts may be added to first water given to victim. Victim should refrain from physical activity while recovering. If victim must move, take frequent breaks for rest and water.
  6. Drowning – Symptoms: Submerged victim does not breathe and/or has no pulse after being pulled from water. Possible Condition: Water in lungs (drowning, partial drowning) Course of Action: Clear airway and follow guidelines under “breathing difficulties.” Prepare to administer CPR.

I hope this comes in handy when you really need it. I also hope you learned something new as well. Remember that you should only use these skills when you are in an emergency. You should always take the injured person to an emergency room if you have access to one.

Thank you again for reading my blog post on First Aid. Please leave a comment and also don’t forget to click on the button at the bottom to become a follower.

Survival Tip – Edible Plants Part I

Hey NW Tactical family,

Today we will be going over what plants you find in nature that are edible. This will be an ongoing series so keep a look out for more to come. There are many plants and tree’s out there that you would never think are edible but they are, and if you are in a pinch gobble them up and enjoy. I will be going over how to recognize them and what part of the plant is edible and how to prepare them. So let’s get down to business.

acorns

  1. Acorns: Hard, round, capped fruit of the red and white oak tree. Slice the cap off and split the shell. The flesh inside is edible, but make sure to dry it out first. The white acorns have a much better flavor then the red ones. You can either eat the acorns plain or salt them. You can also grind them and use as a coffee substitute.
    bamboo 
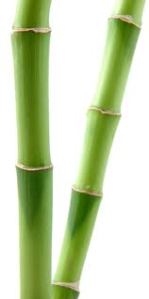
  2. Bamboo: Giant, fast-growing grass.The pith is edible, as are the bamboo seeds. First split the bamboo shell the remove the pith with a knife. Cook the pith like you would cook asparagus in boiling water. You can eat the seeds raw. Bamboo is a good source of water, to find it shake the bamboo and listen for a sloshing sound.
    Barrel Cactus
  3. Barrel Cactus: Desert plant with J-Shaped barbs. A cactus is a great source of water. The barrel cactus grows up to four feet tall. You can eat the fruit that grow off them but the taste is bitter and dry. Native American’s used to collect the fruit when there were food droughts. Be extremely careful when approaching a barrel cactus, if you are poked by one of the thorns it can be a very serious wound clean immediately. Wounds from the cactus are consider “dirty wounds”, if it is deep enough to draw blood antibiotics may be needed and could take several months to heal. Another great fact about barrel cactus is that they only grow to the south, so you can use them to gain your barring.
    bgnay 
  4. Bignay: Shrub or small tree, The Bignay can grow from 10 to 35 feet tall. The Bignay has long, pointy leaves and flowers that grow in clusters. Fruit is the width of a finger, fleshy, and dark red or black. It only grows in the tropics. Only the fruit is edible, you can eat the fruit raw. Make sure not to eat the roots or other parts of the tree because they are POISONOUS.
    Bearberry
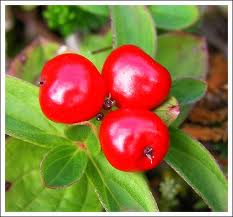
  5. Bearberries(Kinnikinnick): Evergreen shrub, that grows at high latitudes. The Bearberries has a reddish bark, white flowers, and red fruit. The berries and leaves are the only edible part of the shrub. You can use young leaves to brew tea, and only eat the berries when cooked. Make sure not to eat these in large doses, in large doses it can cause vomiting, back pain, and fever. So even though its edible do not eat a lot, and only eat if you must and are in a survival situation.
    Bistort
  6. Bistort: Grow one to two feet tall. Has triangular, narrow leaves on a thin, straight stalk. Grows in grassland and woods far into the north. You can eat the leaves in the spring and the roots in the fall. You can put the leaves in a salad for a nice green lunch. Soak the roots to remove the bitterness, then thoroughly roast the roots before you eat them. You can also dry, and grind the roots into a powder to use as an antiseptic.
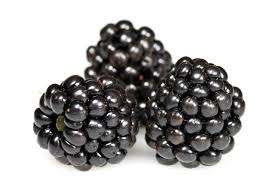
    Blackberries
  7. Blackberries: Dark, aggregate berries on thorny canes. Berries grow on fiercely sharp thorns on arching stems. Canes grow in woods, scrub, and open ground in temperate climates. Fruit is popular with birds and other animals, so canes make good hunting sites. Make sure to rinse the berries first. On a side note that is not survival related, blackberries make an incredible jam. YUM YUM YUM!!!
    Black Walnut
  8. Black Walnut: Fruit of black walnut tree. Look for hard, green globes with a thick husk on limbs with paired, serrated leaves. Mostly found in temperate forests. To prepare crack open the husk and shell then remove the meat and enjoy.
    Breadfruit
  9. Breadfruit: Fruit-bearing tree can grow up to 50 feet tall, the leaves are more than two feet long, and with fruit that is very large and has hard seeds so be careful not to chip a tooth. The Breadfruit tree mostly grows in the tropics. The seeds are edible when cooked, do not eat raw. You can eat the fruit raw after removing the skin, or you can slice, dry it, and the grind it into flour.
    Burdock
  10. Burdock: A biennial, flower thistle. Stalks grow 6 feet tall. Velcro-like stick-tight heads. The Burdock grows in northern temperate zones. You can eat the leaf stalks raw or boiled. Bake or boil before eating the roots. Be sure not to eat the leaves they can be confused with poisonous rhubarb.

These are all edible plants but should only be consumed when in need and you are in a life or death situation with the exception of the blackberries. I recommend picking and eating blackberries as often as possible. It is a fun activity to do with your kids, then teach them how to make different homemade treats with them such as blackberry jam or blackberry pie/cobbler, or just cover in sugar and gobble them down. Remember to eat these plants in moderation do not eat large quantities. This is only a small fraction of edible plants out there and there will be many more edible plants to come.

Thanks for joining me today and I hope you learned something new. If you have any comments or questions please leave them and I will try my best to answer them all. Also don’t forget to click on the follow button so you don’t miss out on any new posts. 

Survival Tips – Insect Do’s and Don’t and How to remove a Leech

Image

Hey Guys,

Lets talk about bugs and leachs everybodies favorite topics. Bugs and leaches are both gross and can cause serious harm to you.

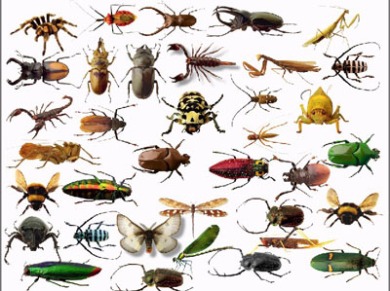
There are plenty of different types of bugs in the wilderness and some of them are huge. I’m gonna cover what to do to avoid bites and stings.

  • Use insect repleelents such as DEET or permethrin. Permethrin is a synthetic chemical that is widely used as an insecticide, acaricide, and insect repellent. A cool fact about permethrin is that the US Army is fielding factory treated uniforms to protect soliders against bug bites in countries where bugs carry deadly diseases.
  • If you are in a situation where you do not have netting or access to repellent you can use mud or oil as a repellents, just smoother it all over your skin and your good to go.
  • Surround your bed with netting to add additional protection against bugs. Make sure that you do not sleep directly against the net because the bugs will still be able to reach you.
  • To add additional protection to your bed add repellent to ropes that suspend your bedding.
  • Make sure to check your body especially your scalp and crevices daily for bug bites and ticks.
  • If you are in the woods, or jungle make sure to wear something that covers your head so bugs to not drop, fly or crawl into you hair.
  • When you make camp for the night make sure to make a real smokey fire to deter bugs. One way to do this is to find as much alive/green wood as possible, also damp wood will burn slow and smokey.
  • Do not walk thru the forest or jungle barefoot. You open yourself up to step on something that can either sting or bite you.
  • Do not let your wet clothes dry on the ground. Insects are attracted to dark damp places and may lay eggs in your clothing.
  • Do not wear perfume or use excessively fragrant soaps or deoderants, the odor attracts bees and wasps.
  • I highly recommend not to walk to jungle in a hawiian shirt, not just cause its tacky but because it will attract pests to you rapidily.

Forests are abound with bugs especially ants. Bugs cover nearly every conceivable surface in the forest, it doesn’t matter where you step, sit, lean you will encounter ants. One very important preventative measure is to raise your bed off the ground. Use repellents that contain 15-30% deet, do not use a higher concentration because it can be bad for your health. When using it cover your entire body. Cover an exposed area and also your clothing. Spray your socks, spray your pants and your hands so you can rub it into your hair.

Image

I want to cover how to remove a leech real quick. Sticking to things that make you squirm I thought leeches will fit right in. One important thing to remember is do not burn the leech off, which is a common belief because of pop culture. Burning it will remove it from your skin but it will also cause the leech to regurgitate into your skin, which will most likely cause a serious infection. Instead move your fingernail under the thin end of the leech to break the seal on its oral sucker. Then as quickly as possible do the same to the thicker end of the leech before it reattaches itself to you.  Once the leech has been removed flick it away and apply antibiotics. Leeches release an anticoagulant when attached so they can feed continuously, so the bite will bleed profusely. Just treat like you would any other bleeding wound and you will be fine.

I hope you all enjoyed ready this blog post. Remember to please leave any quesitons or comments and also don’t forget to click the follow button so you don’t miss out on any new posts.

Survival Tips – How to apply first aid to yourself or a companion

P79_first_aid__14244_zoom-287x300

Hi NW Tactical family,

Today I wanna go over some basic first aid that you can use on yourself or on your companion if you are not near a hospital. These are tips should only be used if you can not reach a hospital, a hospital should always be your first option if its available.

  1. Allergic Reaction – Symptoms: Skin swells and turns red. Hives, itching, weakness, nausea/stomach cramps, vomitting, difficulty breathing, obstructed airway, low blood pressue, and shock. Possible Condition: Allergic reaction/anaphlactic shock(anaphylaxis). Course of Action: Check airway/ move victim into the most comfortable position possible so they can breath unassisted. Keep victim calm, Administer antihistamine. If you have an epinephrine auto-injector in your first aid kit you should inject it if allergic reaction is severe. It is always a good idea to have an epinephrine auto-injector as part of your first aid kit because you never know what you or your companions will be allergic to in the wild, it may be something that you never knew you had.
  2. Bleeding-Surface – Symptoms: Blood running down body part or blood pooling on clothing, or blood spurting from a wound. Possible Conidition: Torn or cut blood vessel or punction wound. Coure of Action: First thing you want to do is cover the open wound with a sterile dressing and bandages to control bleeding and prevent any sort of infection to set in. If wound requires continuous pressure and you cannot hold it there apply an elastic bandage or tourniqut the nearest artiry. Remember that if you apply a tourniqut make sure that you get help as soon as possible or the wounded person could loose the limb. To apply elastic bandage place end of bandage against skin and roll it around wounded limb while gently stretching it, start from the farthest area from the heart. When finished, tape or tie in place. Make sure that you do not wrap it to tight that you cut off circulation. If blood starts to seep thru bandage to not remove old dressing just add more. Do not completely close wound off from the air, except for certain chest and abdominal wounds(I.E. sucking chest wounds or gut shots).
  3. Bleeding Internally – Symptoms: Vomitting or coughing up large amounts of blood. Bruised, tender, swollen, or hard flesh. Severe pain/inability to move injured body part. Weak, rapid, pulse. Pale, bluish skin or cool moist skin. Excessive thirst. Confusion, drowsiness, or loss of consiousness. Possible Condition: Injury to a large blood vessel and deep muscle tissue, bleeding beneath the skin. Course of Action: Apply Ice on and off wound for 20 minute intervals. Wrap in damp cloth to prevent ice from being directly on skin for long periods of time. Keep victim still and comfortable and elevate injury if it does not cause excessive pain to the injured person.
  4. Blisters – Symptoms: Large and painful fluid filled sac beneath the skin. Possible Condition: Burn causing blister or excessive friction to a concentrated area. Course of Action: If the blister forms and there is a small chance that the area the blister is on will come in contact with abrasive materials then leave it alone to heal on its own. Never ever pop a blister that has been caused by a burn. If the blister is on the bottom of the foot where it will encounter abrasive materials then clean the area around blister and use a sterile needle to puncture blister and drain fluids. Make sure to apply a sterile bandage once all fluid is expelled from blister and if the bandage is wet from fluid make sure to change right away to ward off any infections.
  5. Broken Bones – Symptoms: Sudden, serious deformity. Bone sticking out of skin, Bruising or swelling. Unable to move a specific body part with out severe pain. Victim heard a loud pop, crack, or snap sound. The sensation of bones rubbing together. Injuried area is numb or cold. Possible Condition: Broken bone or fraction or compound fracture. Dislocation. Course of Action: Immobilze the injuried body part as it was found. Absolutely do not apply a splint unless you have to move the victim to get help, if you must apply a splint do so above the fractured area, and do not manipulate injuried area. SOme options for splinting are, splint injured area to another body part; making a soft splint or sling for injured arm, wrist, or hand; and splinting a fracture with wood, metal, folded magazines, or anything else that is rigid and offers a lot of protection and support. Apply ice to the injured area, but make sure to have a cloth barrier between ice and the skin. While applying ice to injured area elevate if possible without causing great pain.

Those are just a few quick tips on some basic first aid. Please remember that it is always best to seek a medical professional first but the tips will help if you are in a remote area or help will not arrive fast enough. Please keep an eye out for more first aid tips to come.

Thank you for joining me today, I hope I was able to teach you something new. Remember to leave any questions or comments and also click on the follow button at the bottom of the screen so you don’t miss out on new blog posts.


Survival Tip – Basic Survival Kits

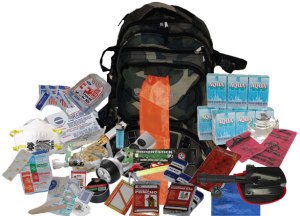
survival kit

Howdy NW Tactical Family,

Today will be talking about basic survival kits. You should always have a survival kit ready to go in a closet and also if possibly one in each car you own.

There is no such thing as the perfect survival kit. The right kit will vary depending on the nature of the trip or disaster. In general, it should be simple, small, affordable, functional, and waterproof. Most of all, in the hands of someone lost in the wild, it should be as familiar as a razor or a toothbrush. Any kit prepared for use in an emergency should be field tested before it’s needed. A wire saw for cutting limbs should be field tested in your backyard, a magnesium rod should be sparked in your fireplace or on a routine camping trip even if you have plenty of matches around. Having a kit but never using it until “do or die” day is like jumping on skis for the first time and heading to a black-diamond slope(which in my case I have actually done, but not on purpose. My friends took me on a double black-diamond on my first snowboarding trip. Lets just say I ended up walking down 3/4 of the mountain do to a gear malfuntion).

Items that can serve a multitude of uses are most desirable because they conserve space and weight. Remember those two commodities are very important especially weight. You do not want to hauling around a ton of weight if you are lost and weak. The boy scouts red scarf is a great example. It can be drawn across surfaces to collect dew for drinking, soaked in a stream to cool the head, knotted to make an arm sling or ankle brace, or used as a signal flag. Also like my previous post, paracord has many different uses such as snare to catch wild animals for food, it can be used as shoe laces, it can be used to tie up food high in a tree to keep away from bears, you can pitch a tent with it, it can be used a turniquit. Items such as these are very important and take the time to figure out things that can be used for multiple purpose. Elastic Bandages can be used in splints and as part of the treatment for snakebite. A shiny space blanket can be used for creating an emergency shelter, signaling to a seach-and-rescue team, or melting snow and ice to make drinking water. Get creative and have some fun.

Crucial items such as a stout knife(read some of my earlier blog post to find a good knife for you, all the ones I have done are great for survival purposes so choose the one that you like best and fits your needs), a compass, and a whistle to attract attention should be tied to paracord and hung around your neck, or you can contact me and I will be more then happy to make you a paracord braclet that has a whistle that is part of the clasp. Its a two in one item that takes up no room in your kit and weighs next to nothing. If you are in survival situation, water and shelter likely will be your greatest needs. A kit that includes the means to purify water and provide for an emergency shelter is invaluable. Some things that you should keep in your kit are…

  • First aid items, I recommend buying a simple first aid kit that comes in a small case for car kits and a bigger one for home kits
  • Water purification tablets or drops such as iodine. You can also have a purification system but those are kinda bulky and space is your best friend.
  • Fire-Starting equipment, magnesium rod will be the best since it will work even if wet, metal matches or wood matches, zippo lighter
  • Signaling items, such as a small hand mirror, flare gun, or a folding red panel.
  • shelter items, such as a tent, or hammock, or even as simple as a canvas blanket that can be drapped over some paracord to create a tent when tied down
  • knife – i recommend having two knives. You will want a small knife like the ESEE Candiru for everyday tasks and simple slicing or cutting and also a survival knife such as the SOG SEAL Pup for protection or bigger tasks also the SOG SEAL Pup is extremely light and remember weight is your enemy so the lighter the better.
  • Needle and thread, paracord has 7 threads inside the outer sheath that will double as thread and fishing wire
  • Wrist compass
  • Fish and snare lines are good to have since they are specific for that purpose but paracord can be used and will save room. I would recommend to just use paracord
  • fish hooks or if you do not have them you can use a paperclip or a safety pin.
  • Candle
  • small hand lens
  • solar blanket
  • surgical blades
  • water bladder or plastic bottles. Water bladders are recommended cause when empty they take up virtually no room and weigh next to nothing. Be careful not to puncture the bladder cause it will be a major lifeline.
  • High calorie and protein foods such as powerbars and granola. Non-perishable items
  • flashlight, hand crank radio
  • glow sticks
  • sleeping bag
  • hand warmers, they don’t seem important but a little warmth will go a long ways in lifting your spirits and keeping you going
  • Utility tools, one of those leatherman 16 in 1 tools
  • waterproof folding poncho
  • duct tape
  • note pad and pencil
  • hygeine supplies such as a bar of soap and deoderant
  • Playing cards. This doesn’t seem like it will save your life but it will save your sanity. Small games go a long ways to keeping you alert and your spirits up.
  • Batteries, make sure to have a few of every kind. Do not bring items that rely solely on batteries but if you do have something in the kit that requires them make sure to have backups. A good rule of thumb is to bring electronics that can be hand cranked or solar powered.
  • my favorite Para-Cord atleast 50 feet, i recommend a 100 feet though.

Also I personally recommend to have a weapon of some sort available to use incase you need to protect you and your family or to hunt for food. If it is a car kit make sure you carry weapons that are legel(read your local laws regarding weapons). In a car kit have a survival/tactical knife or a gun that is safely secured in your vehicle. If you do decide to have a weapon in your vehicle spend the extra money to have it safely secured somewhere that you are the only one who knows where it is and make sure that it is locked and out of sight and reach of children. I also recommend have a weapon at home, which is a personal opinion and I understand if you do not feel comfortable having firearms in your home especially if you have children. You should always have your weapons in a safe that is locked at all times. You can also have bow and arrows or blow guns which are great weapons when used correctly but make sure to practice. Also bow and arrows can last longer then firearms and are easier to make ammo for then a gun. You can make an arrow out of sticks and you can buy arrow tips for really cheap.

You do not need every single item I listed above but make sure to have most of them. If its a car kit then you can pair down to the essentials. If it is a home kit then have as much stuff as possible and remember to have plenty of clean drinking water. It is recommended to have one gallon per person a day. So plan accordingly and have about a weeks supply of fresh water, and canned non-perishable foods that are high in calories and protein. All the items should be put in a bag or backpack of some kind, even if its a home kit just incase you need to leave the safety of your home. All bags and backpacks should be easy to carry and most important be waterproof and fire resistant if possible.

So in conclusion remember light and small is better, and do not have items that do the same function. If you have paracord then do not bring rope, if you have metal matches do not bring wood matches, and most of all when you are putting the kit together get creative and have some fun. Even though you will use this kit when the shit hits the fan doesn’t mean you can’t have fun putting it together, and if you have a family make sure everyone is involved in putting it together and testing the equipment so that they will know how to use it incase you are not there to do it for them. Also last but defiinitely not least make sure to have a list of everything that is in the bag/kit incase you don’t use it for a long time. Also try not to borrow things out of the kit, because most of the time it doesn’t get replaced and you will be kicking yourself when push comes to shove and you don’t have something that you need.

Thanks again for joining me, please leave comments, or if you like this please share using the buttons below. Also make sure to click on the follow button so you don’t miss out on great survival/tactical tips and reviews on gear.