Sup Y’all gun geeks,
We’re gonna be reviewing Point Shooting. I really think more people should be training using this method for short distance CQC(Close Quarters Combat) then training looking down the barrel using the sights. When push comes to shove your adrenaline will be pumping and your mind will be racing so fast that you will not have the time or wherewithal to even think about using your sights, you will just start blasting away and missing every time. Even our trained LE have that same problem, but now most departments are starting to train with Point Shooting or Flash Shooting. These tactics are used by most of the top shooters in the world such as Delta Force, SEAL Team Six, SAS 22. It takes a lot of practice to get good at or even sufficient. You will need to be at the range day after day putting hundreds if not thousands of rounds down range, but in the end it will be all worth it when it comes time to protect your loved ones.
Recent science says that we lose our near vision and our fine motor skills when our fight or flight response is activated, when sight shooting both of these skills are needed to properly sight shoot. When you are in the fight or flight response you will only be able to do what your muscles have been trained to do. Studies say that most handgun fights are fought within 5-8 yards which doesn’t give you much time to react if you are being charged at or if someone else draws a weapon. Point shooting is a method of shooting a firearm that relies on a shooters instinctive reactions in a life threatening situation to quickly engage close range targets. The method is used in close quarters fighting do to lack of time to react, or you have low light conditions which hinder your ability to use your sights. When practicing point shooting it is very important to have the correct handgun for you, it must feel like an extension of your arm and hand. Do not switch guns when practicing cause the slightest difference in your gun can change the way you point shoot. The weight of the gun, the handle of the gun, the caliber and recoil can all throw off the mechanics that you are teaching your body to use in emergency situations to protect yourself and loved ones.
Now we will go over some techniques to use when point shooting, since to be effective at it you will need to practice a lot. Just like anything else that takes skill, such as basketball, football, baseball. These all take lots of practice to be good at and so does point shooting.
- Position yourself 3 yards away from a large(10 inch) target. In an athletic stance where you are on the balls of your feet, execute a tactical quickdraw(covered in previous post) to a firing position and fire multiple rounds into the target. I recommend to fire anywhere between 3-6 shots. DO NOT USE YOUR SIGHTS!!! The point of the drill is to get you used to not using the sights. It may take a while but you will learn to hit center mass of your target every time. One key is to try to do it as quickly as possible, but try to take just enough time to allow the momentum of your arms and gun to slow right before you pull the trigger. I like to call it controlled chaos, I teach it to my 10-year-old basketball team when doing lay up drills. Practice this drill till all your shots are in a grouping of a couple of inches. Grouping is very important, it doesn’t matter if you hit the target every time, if they are all over the place it is not effective. You want your hits in a small group near center mass. Once you have good groups at 3 yards on a 10 inch target move it back a few yards and use a small target and keep going till you reach no further then 8 yards and your target is no bigger then a standard picnic plate.
- After you feel you have a good grasp on step one you can start practicing with multiple targets. Try setting up 3 or more targets a couple of yards apart, some closer and some further away but all no further than a 5-8 yards down range. Now execute a tactical quickdraw and go down the line, one shot per target. Once you feel comfortable with this drill and you are hitting center mass change it up. Keep targets in the same spots but put a burst of 2-3 rounds in each. Try them in different order, or have a friend tell you which one to shoot (“one!” “two!” “three, one, two!”), the key thing is to make sure that you can hit your target center mass every time, once you can do this try to accelerate your pace. But remember to always make sure that you are in control and do not try to do more than your skill set allows. To get to this stage will probably take weeks to months of shooting hundreds of rounds every day or multiple times a week.
- Once you have mastered step two, try shooting while moving. While moving you should still be able to hit targets at 5 yards. Set up three or more targets a few yards apart. Start about 15-20 yards back and sprint towards your targets, once you are within 5-8 yards of your target tactically quickdraw your gun before you come to a complete stop. Fire a two shot burst, side step to engage the second target and fire a two shot burst, then so on. Each time you run through course, try to do it faster; try not to pause when shooting.
Tips to make you a better:
- Accuracy and speed can be improved by a methodical and well executed draw, read my post on Tactical Quickdraw, it should help you understand how to execute properly.
- PS abilities vary greatly between people. Dexterity and hand eye coordination are a big component, and some people just are naturally inclined in those two areas. Don’t worry about starting off close to your target, everybody is different it might take you a little longer to figure it out buy with enough practice you will master it. Don’t worry about looking uncool if the target is only a few yards away, it will look a lot more uncool if you are shooting at a target 8 yards away but are missing time after time.
- Point shooting is much less efficient at greater distances, this is why I’m saying to shoot no further than 5-8 yards. I will be covering Flash Sighting which you will want to use for greater distances, it only takes a tenth of a second longer but you will land hits about four times as much.
- I recommend using a low caliber handgun when starting out. Either a .22 or a 9mm will be best because it has less recoil which will help with grouping and shooting multiple rounds quickly.
- Remember SAFETY FIRST ALWAYS. These exercises should only be done by people who are comfortable with handguns. If you are new then you should take some gun safety classes at your local gun range and practice shooting for a few months to get comfortable. Most of these exercises you will not be able to do in your local gun range for safety reasons so you will need to find an area that always shooting and has lots of wide open space. Make sure to know the state and local gun laws before shooting.
- Be sure to know what’s beyond your targets, bullets can travel very far distances.
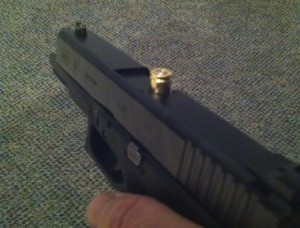
- A great way to practice Tactical Quickdrawing the weapon and shooting motion is to practice with snap-caps, you can buy them at your local gun dealer for under $20.00.
Thanks for reading and I hope you practice this shooting technique cause it will save your life when you are in a life threatening situation. Remember though that this is not a novice technique and you need to practice a lot. This is an expert shooting technique and it takes days, weeks, if not months of practice and hundreds if not thousands of rounds down range before you are consistently hitting center mass with good grouping.
Again thank you for reading and be safe always use gun safety rules when handling a gun.
nwtactical


